ROS 2 inside dev Container
Table of Contents
- ROS 2 inside dev Container
This package will get you set up using ROS 2 with VSCode as your IDE.
Prerequisites
- Ubuntu 22.04 (installed previously)
- Docker (installed previously)
- Visual Studio Code (installed previously)
- Remote - Containers extension (installed previously)
- Nvidia container toolkit (optionally installed previously)
1. Setup VSCode ROS 2 Workspace Template
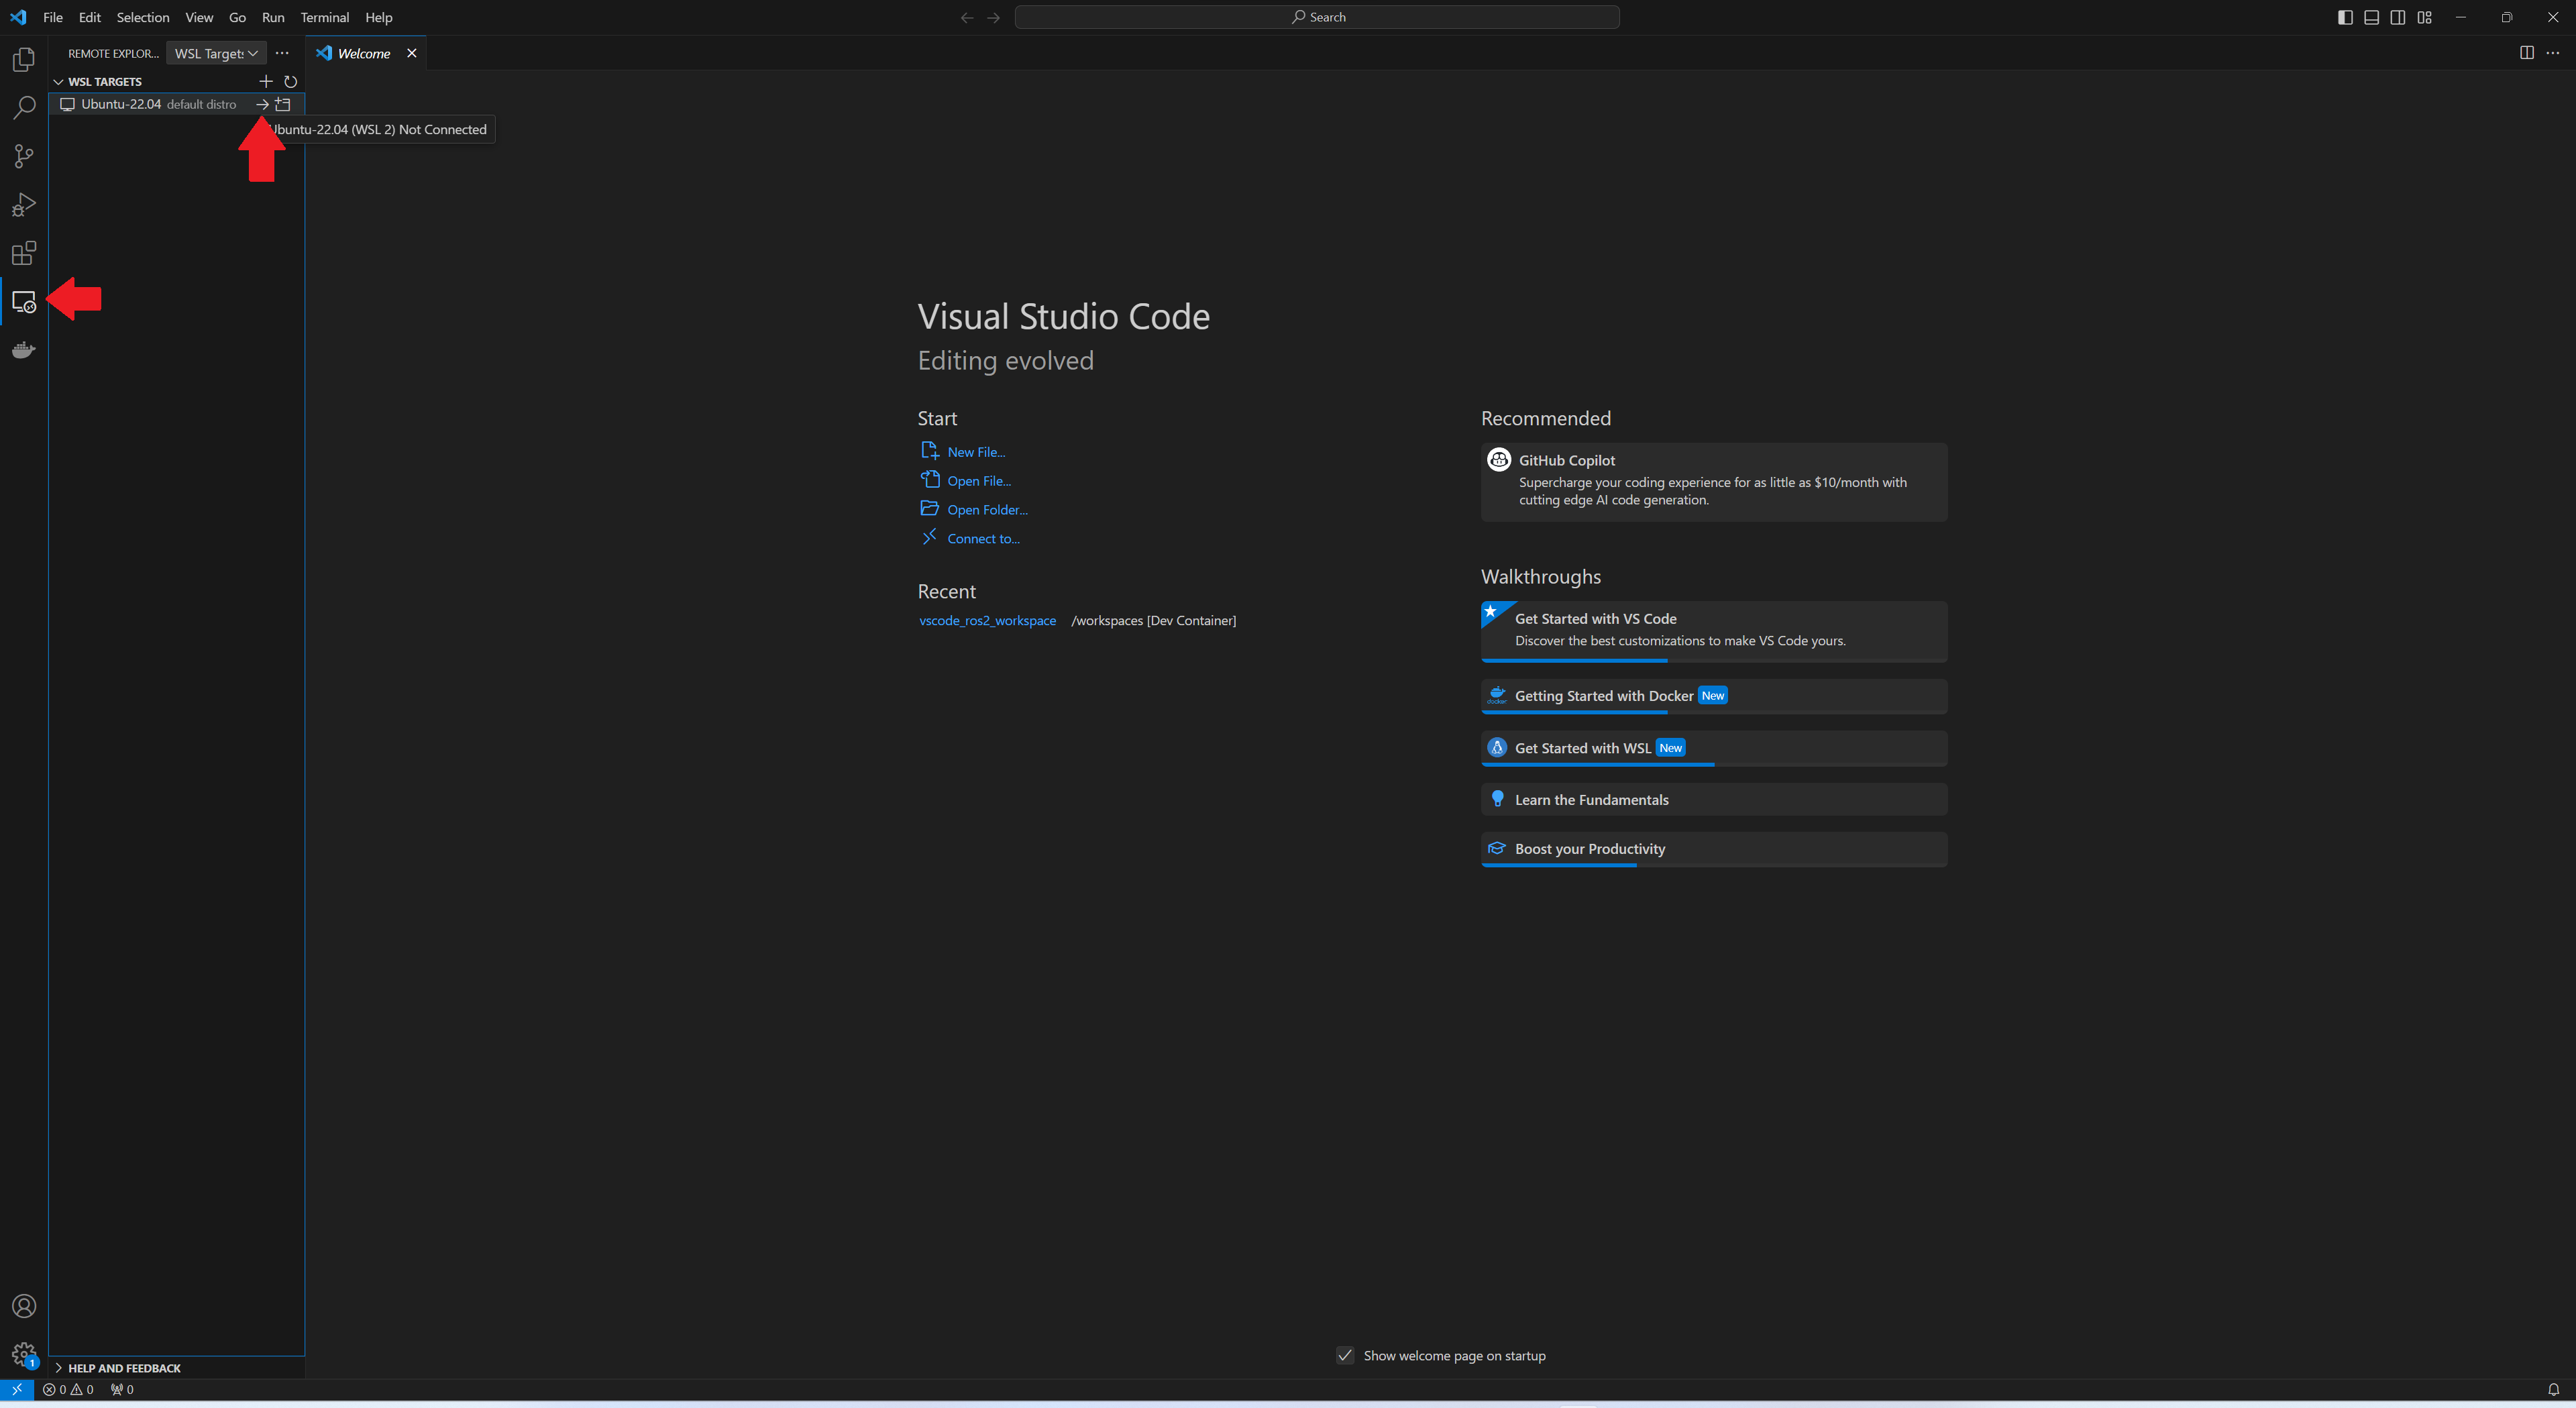
Open VSCode and go to the Remote Explorer tab. Then, connect to Ubuntu 22.04 clicking on the arrow.

If you have an Nvidia GPU, and Nvidia Docker skip the next steps and go to 1.2
1.1 Setup template for ROS 2 (No Nvidia GPU)
1.1.1 Clone the repository
Open a terminal inside VSCode and clone the following repository to your local machine:
cd ~ # Navigate to your home directory (or any other directory of your choice)
## Clone the repository to your local machine (humble branch)
git clone https://github.com/SESASR-Course/vscode_ros2_workspace.git -b humble
1.1.2 Modify the devcontainer.json
Usually using this package the GUI won’t show up because the DISPLAY environment variable is not set properly.
In your WSL2 Ubuntu instance
echo $DISPLAY
the output should be something like this:
:0
Open the vscode_ros2_workspace/.devcontainer/devcontainer.json in the repository and modify the following lines:
"containerEnv": {
    // "DISPLAY": "${localEnv:DISPLAY}", // Needed for GUI try ":0" for windows
    "DISPLAY": ":0", // <-- Paste the value here
   }
1.1.3 Modify the Dockerfile
Open the vscode_ros2_workspace/.devcontainer/Dockerfile in the repository and modify the first line:
FROM althack/ros2:humble-devel
into :
FROM althack/ros2:humble-gazebo
This will install ROS 2 with Gazebo and other dependencies.
After this step and go to 2. Open the workspace in VSCode using Dev Containers
1.2 Setup the template for ROS 2 (Nvidia GPU)
Clone the following repository to your local machine:
cd ~ # Navigate to your home directory (or any other directory of your choice)
## Clone the repository to your local machine (humble-nvidia branch)
git clone https://github.com/SESASR-Course/vscode_ros2_workspace.git -b humble-nvidia
1.2.2 Modify the devcontainer.json
Usually using this package the GUI won’t show up because the DISPLAY environment variable is not set properly.
In your WSL2 Ubuntu instance
echo $DISPLAY
the output should be something like this:
:0
Open the vscode_ros2_workspace/.devcontainer/devcontainer.json in the repository and modify the following lines:
"containerEnv": {
    // "DISPLAY": "${localEnv:DISPLAY}", // Needed for GUI try ":0" for windows
    "DISPLAY": ":0", // <-- Paste the value here
   }
1.2.3 Modify the Dockerfile
Open the vscode_ros2_workspace/.devcontainer/Dockerfile in the repository and modify the first line:
FROM althack/ros2:humble-cuda-dev
into :
FROM althack/ros2:humble-cuda-gazebo-nvidia
This will install ROS 2 with Gazebo and other dependencies.
2. Open the workspace in VSCode using Dev Containers
Open the vscode_ros2_workspace folder in VSCode (File -> Open Folder).
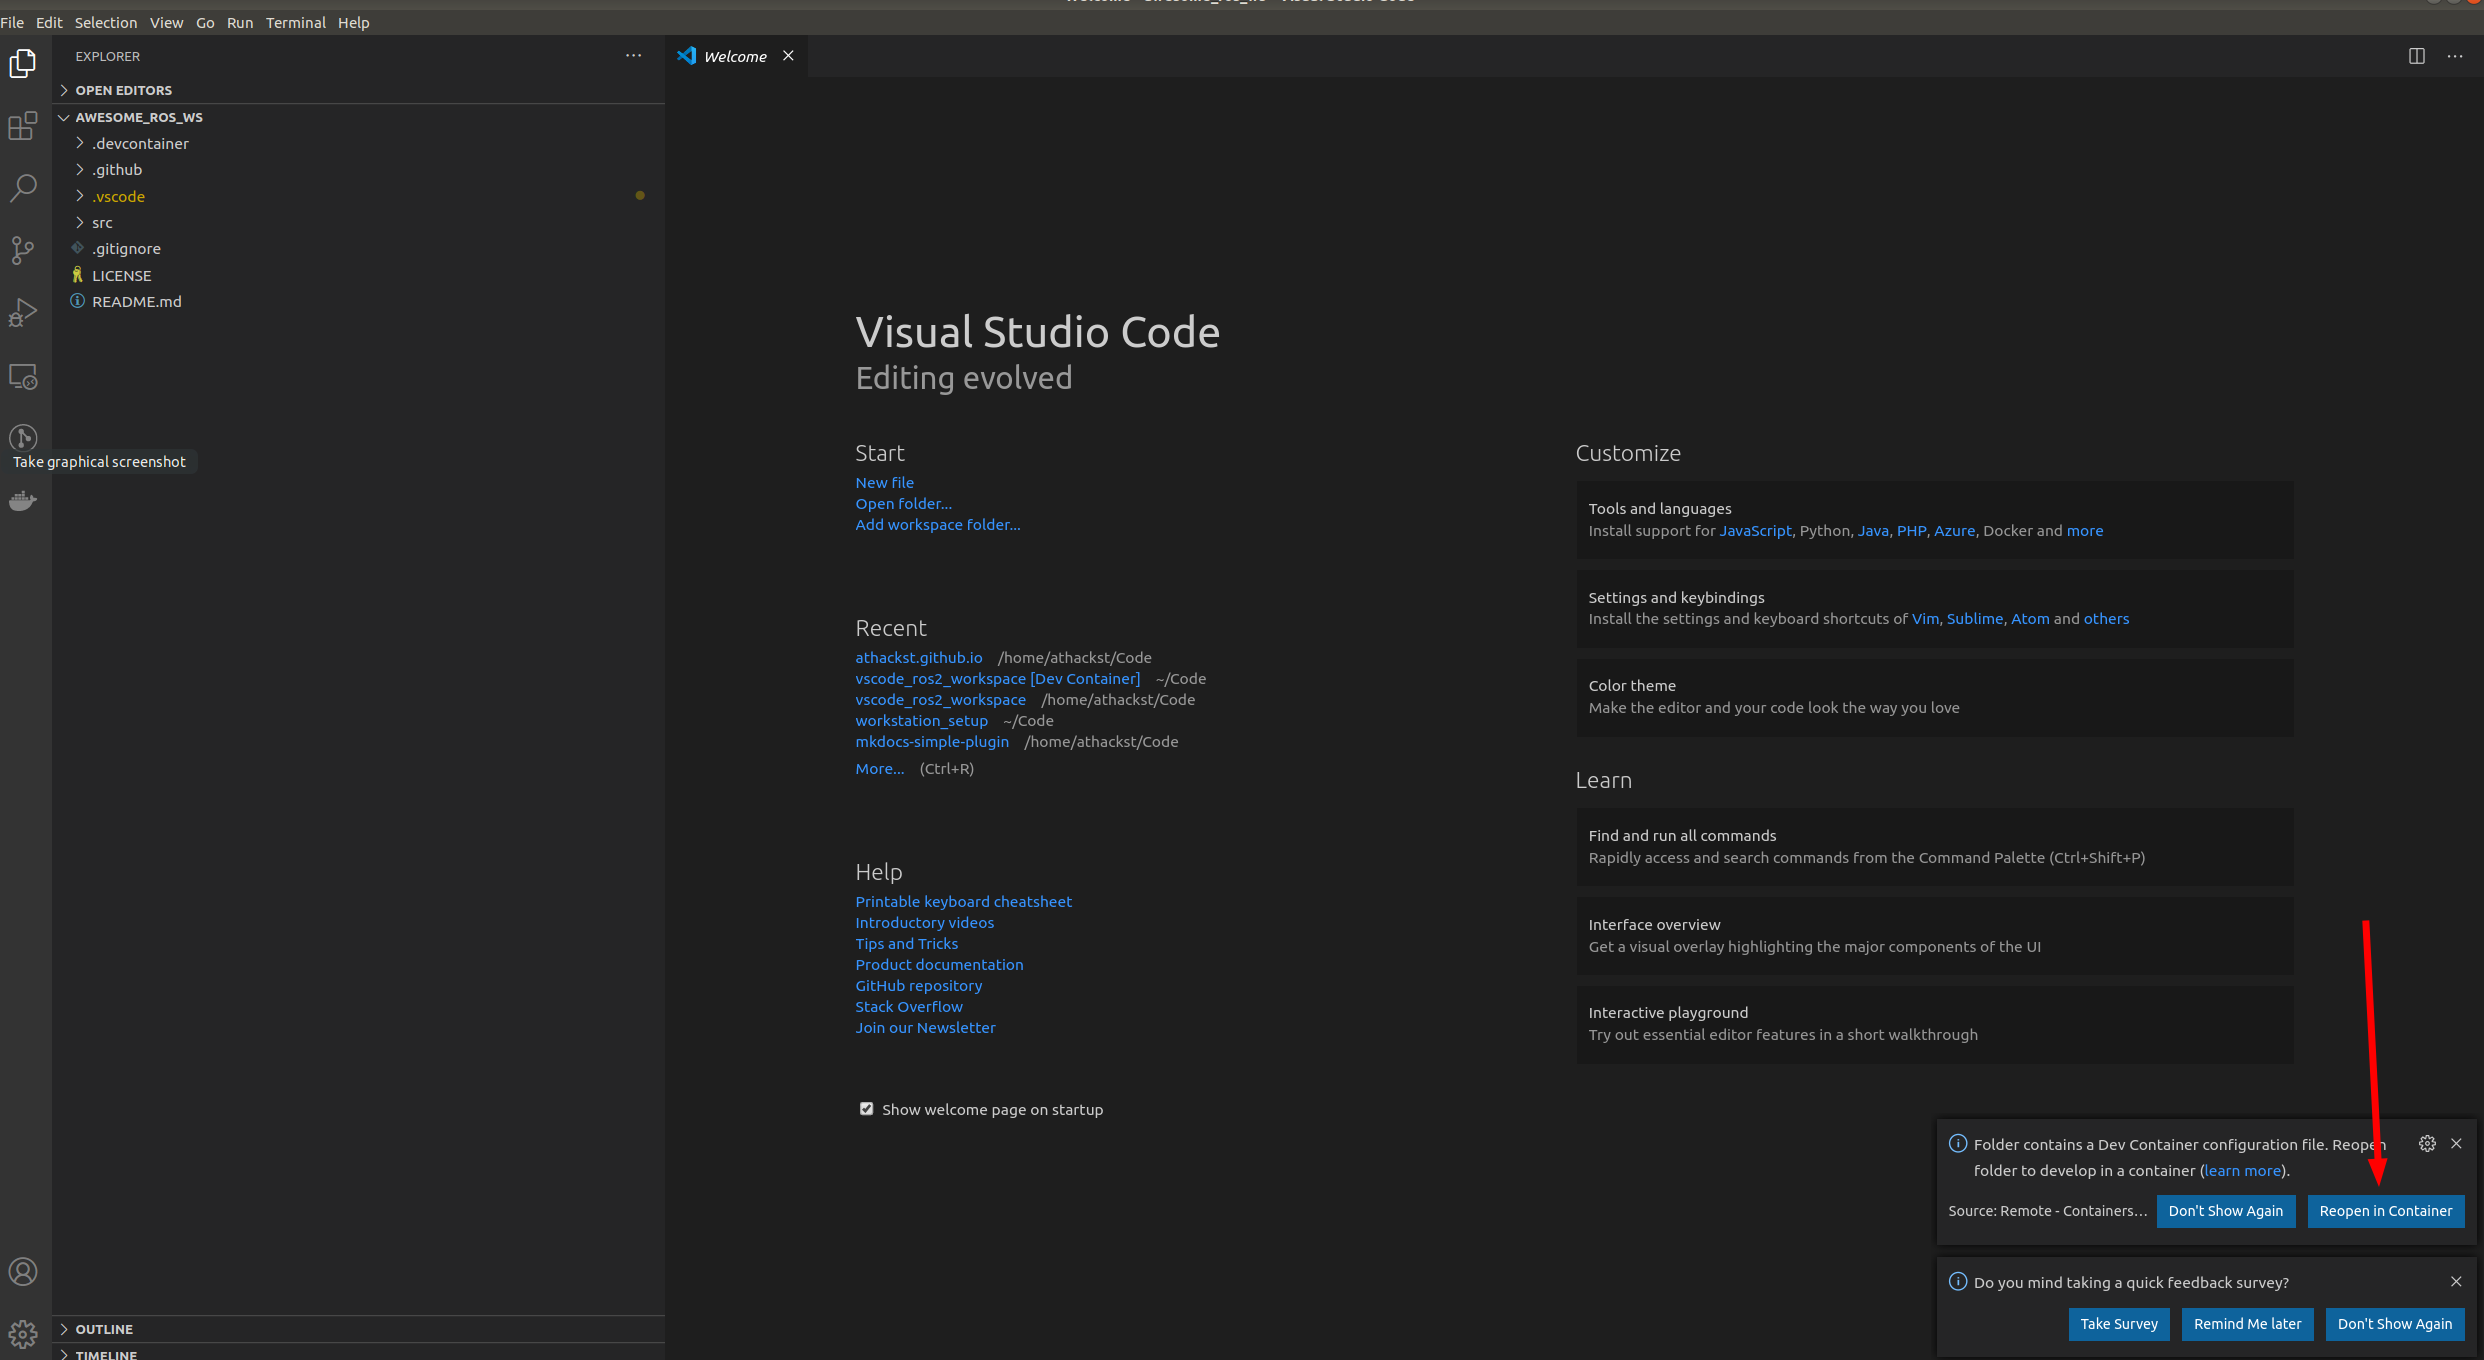
The first time you open the folder in VSCode, you will be prompted to reopen the folder in a container.

Click on Reopen in Container to open the folder in a container.
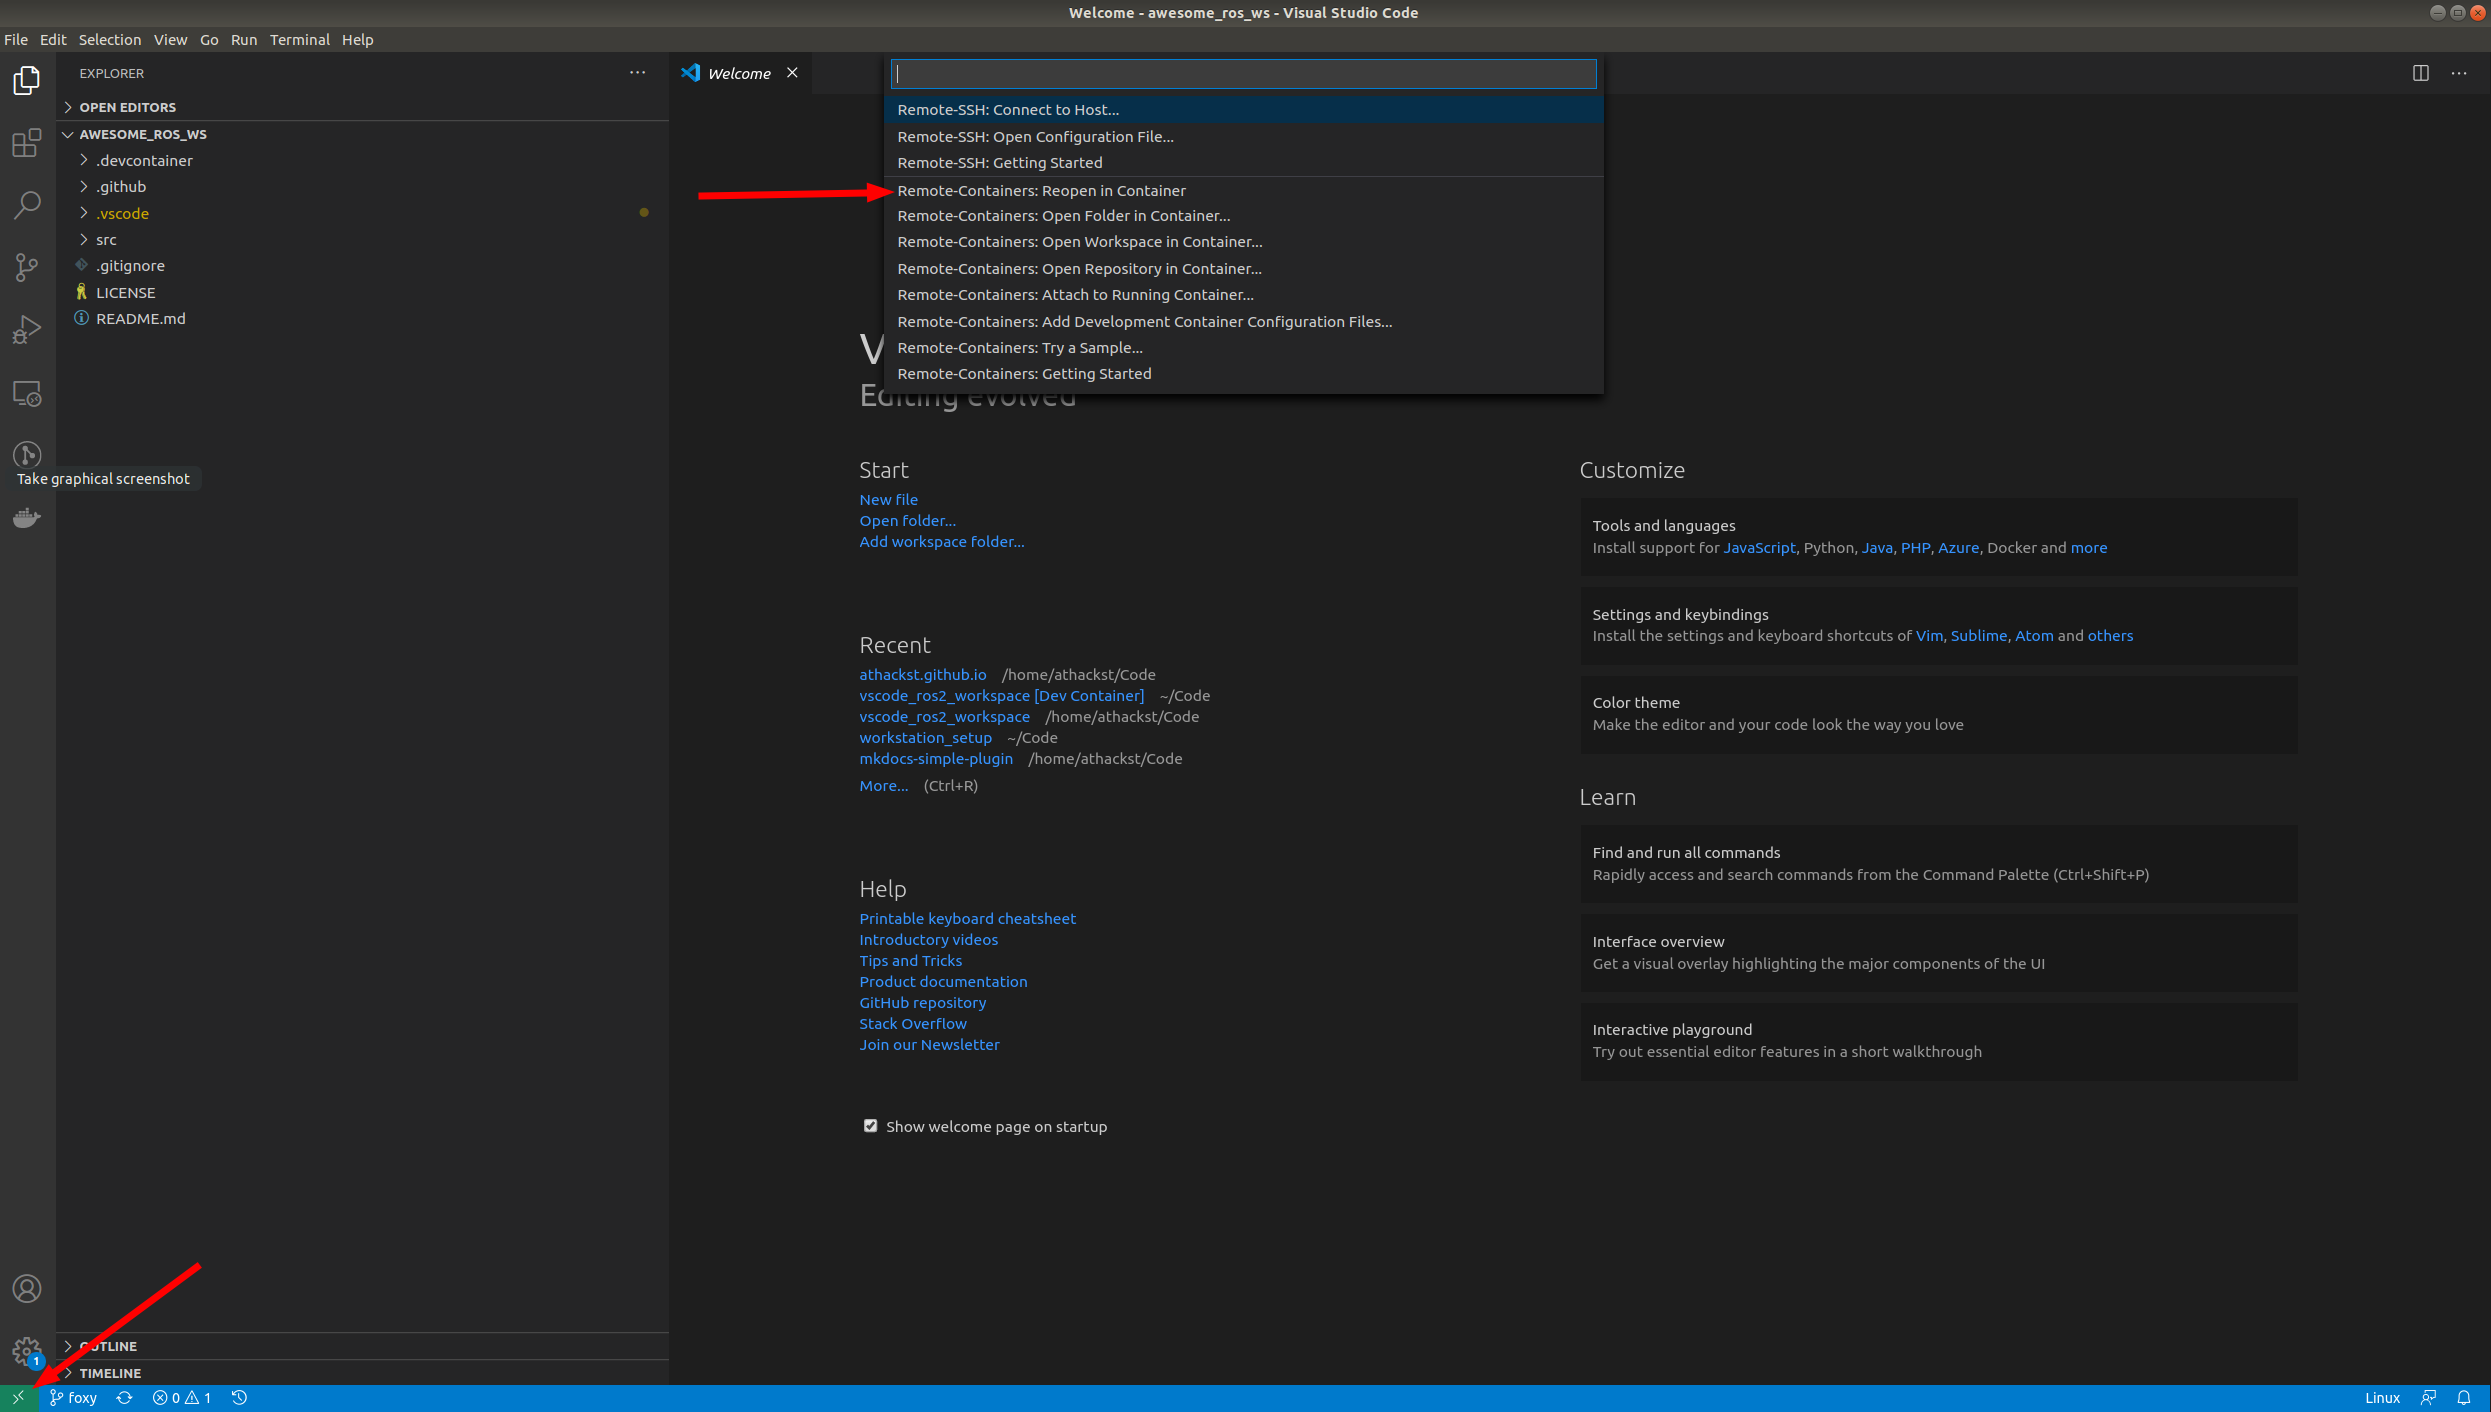
If you don’t see the pop-up, click on the little green square in the bottom left corner, which should bring up the container dialog

In the dialog, select “Remote Containers: Reopen in container” or press Ctrl + Shift + P and type “Remote Containers: Reopen in container”
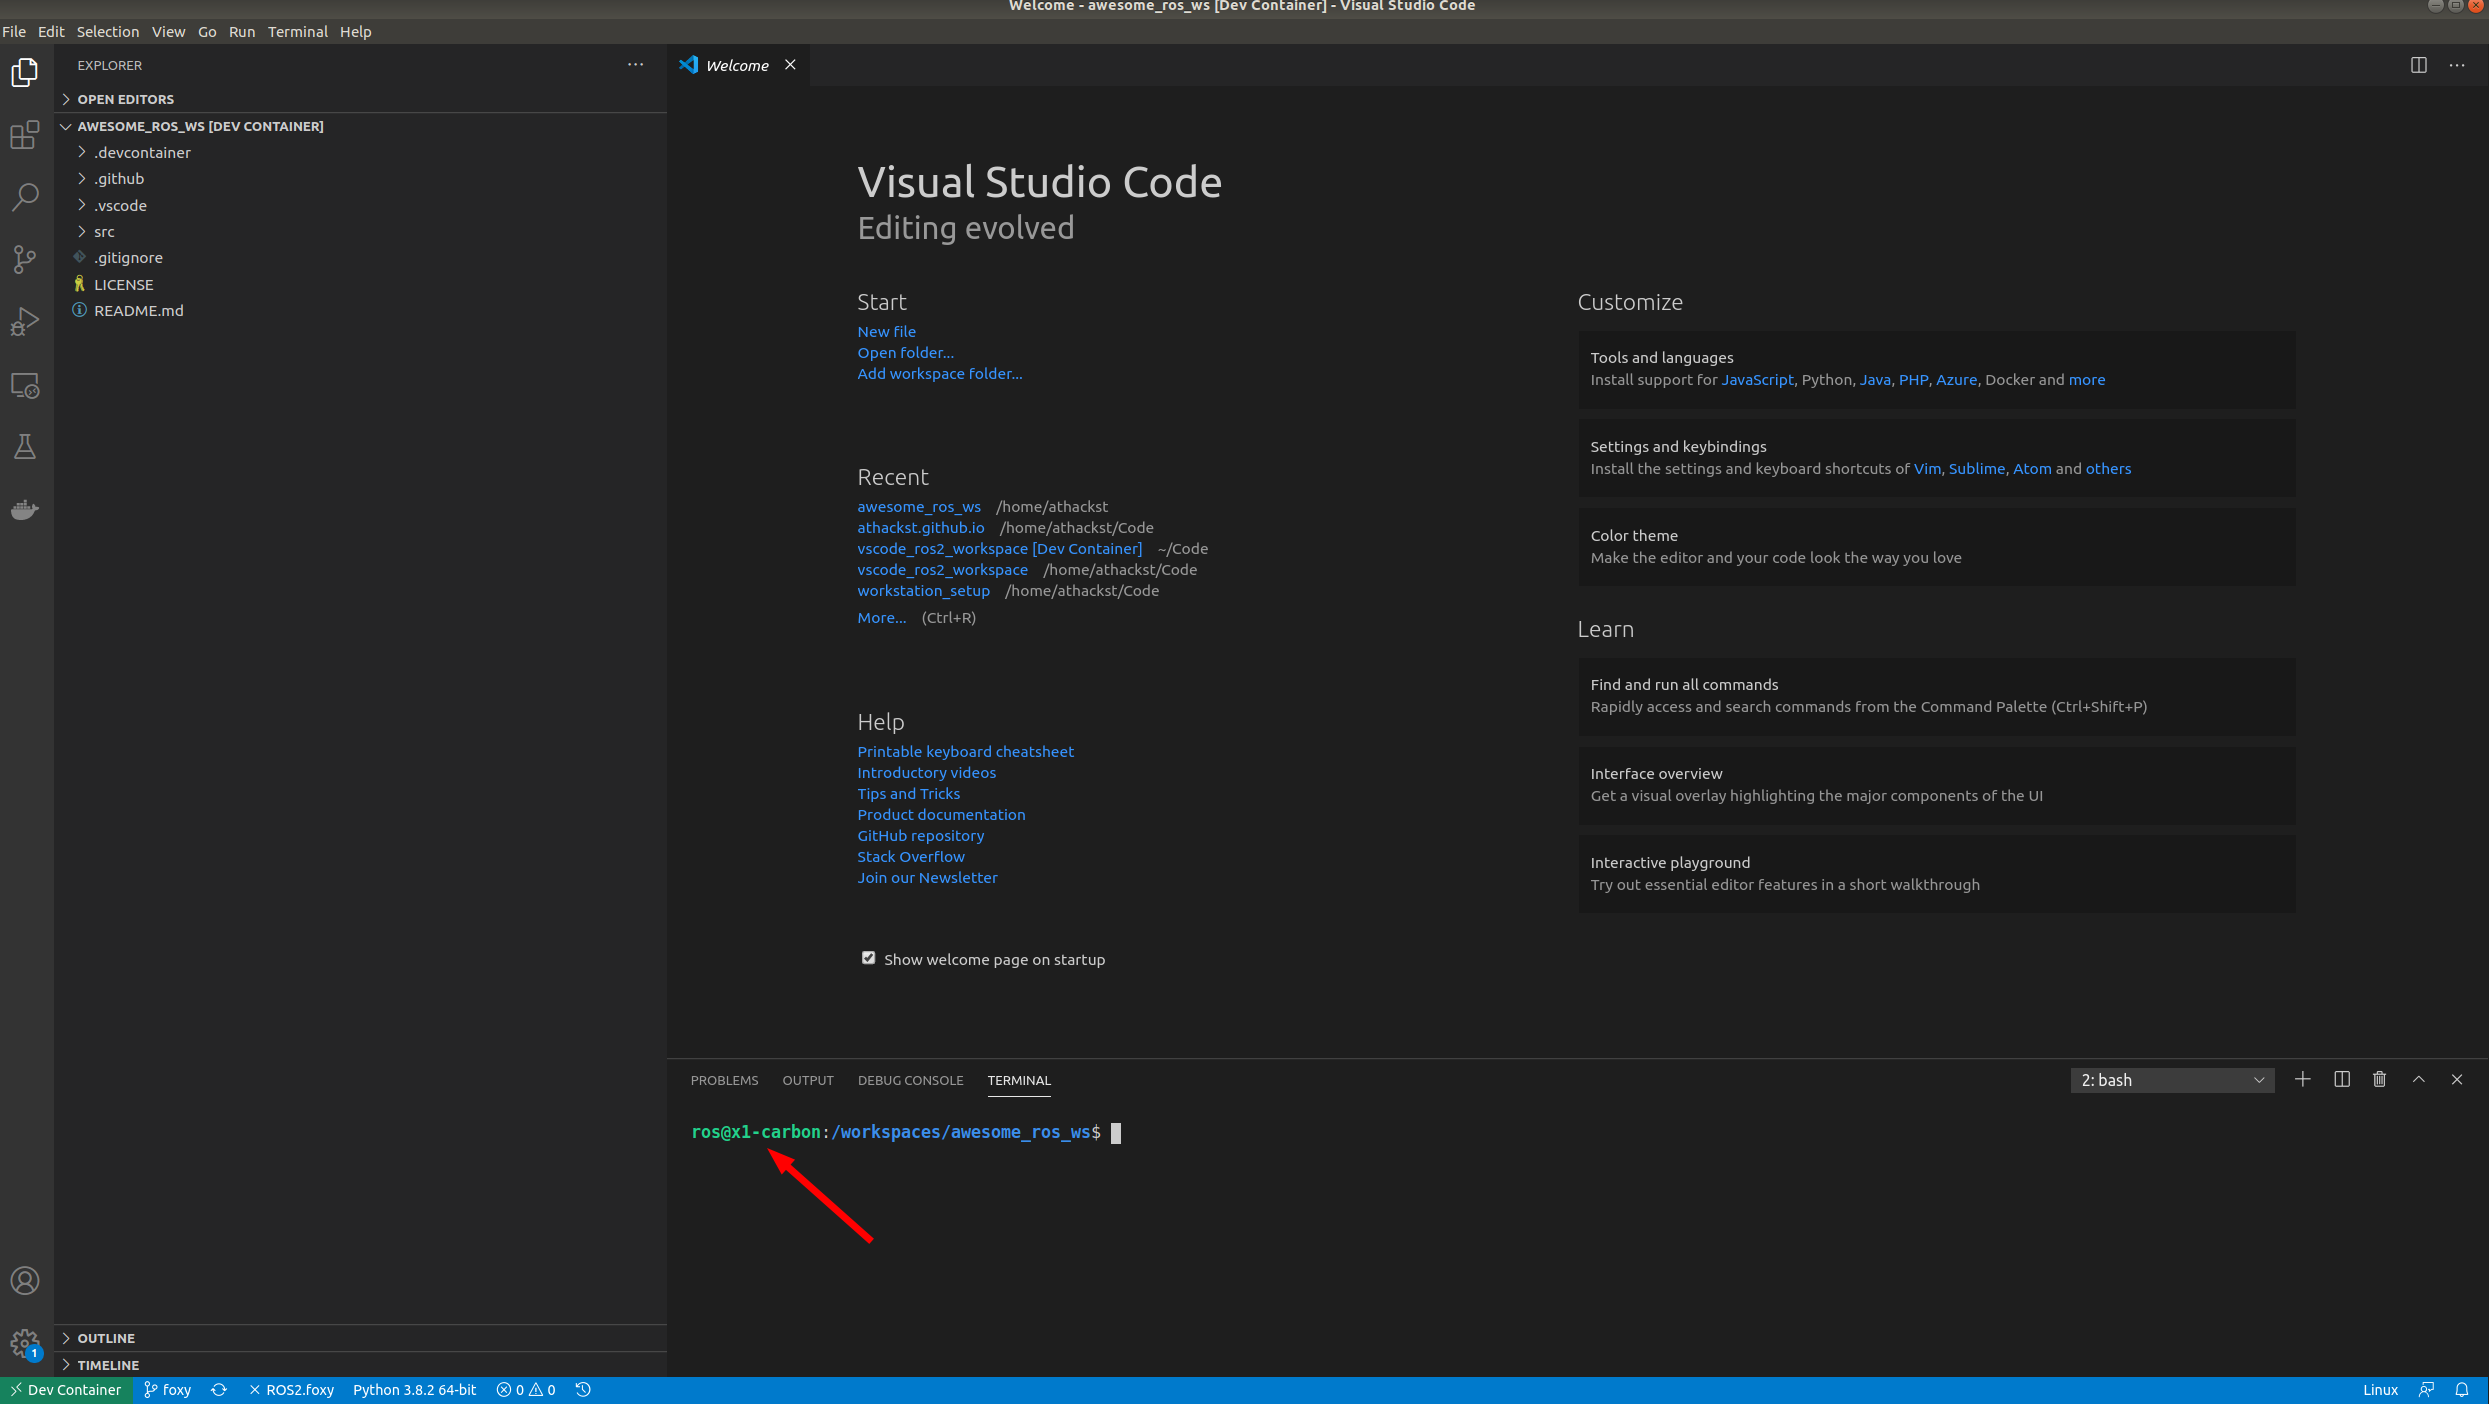
VSCode will build the dockerfile inside of .devcontainer for you. If you open a terminal inside VSCode (Terminal->New Terminal), you should see that your username has been changed to ros, and the bottom left green corner should say “Dev Container” it may take a few minutes to build the first time.

Congratulations! You are now running ROS 2 inside a container!
2.1. Verify ROS 2 installation
To verify the installation, open a terminal inside VSCode (Terminal->New Terminal) and run the following command:
ros2 topic list
You should see the following output:
/parameter_events
/rosout